The ZEBRA:
404 Crewcab Roll cage Fabrication
I'm not sure if any of this will apply to those out there with single cab trucks,
but there may be some information of use anyway. Restoring a crewcab can be somewhat
of a bear at times because certain things are just no longer available, or never really
were, as I found out with respect to the soft top. They were pretty much custom from
the factory and replacements were not offered. Even the side windows could not be
salvaged from a singe cab truck because of the taller windshield and roofline of the
crewcabs. So, since I was going to have to go with a custom made top anyway, I pretty
much scrapped everything that it came with and started fresh.
What I had was a pattern only top - which was actually in OK condition considering the
age, and 4 pretty rotted door windows, which I think they call curtains. The top was
supported by a framework consisting of 1 OD thinwall tubing widthwise over the front
seats, and another at the rear, with slats between these to offer support between them.
I could have kept all this stuff and fabricated a cage to go under it all, since it was
quite tall, but decided that I would prefer a cage that also doubled as a support for
the top, and tripled as an air tank. The cage could also be lower than the original
top height since I had lowered my seats as much as possible.
To have the cage double as a top support meant that it had to be as wide as the body,
for the entire length of the body, o;r the top would angle in. Additionally, it would
have to provide the framework for which the door window frames would seal up against,
and the top could secure to. Throw on some grab handles, seat belt mounting tabs,
location for an overhead CB, torch it together, seal it all up, bolt it in, and your
done. Sounds easy enough..... yeah, right.
This was my first roll cage fabrication so I drove down to my local 4Wheel shop for
some ideas. Mikes only tip was to make sure the bars were not located over where
folks would have their heads. And a good tip that was. Otherwise, he was fine with
what I had already planned, which was a double hoop in the center, single hoops front
and rear, full length spreaders on either side, and two center spreaders.
We selected 1-3/4 inch OD DOM (drawn over mandrel) seamless tubing, an]d started bending.
Then, brought it all home and put together the puzzle. The front hoop, in order for it
to clear the windshield frame, required an eighteen degree backward bend. This same
angle was duplicated with the twin center hoops, which helped place them back behind
my head. The rear didn't need any fancy bends, but all hoops did have a small upward
kink in the center to help prevent crushing of the cage in a roll. The side spreaders
had to follow the contour of the body, which has a 5 degree taper in the front. And the
center spreaders had a small upward angle in them to help pick up slack in the canvas
top. I added gussets at the junctions, and handles anywhere I thought would be nice to
have. Seat belt mounts were also added. All tubes were internally connected with holes
so that the cage could then be my air tank, calculated to give me about 5-1/2 gallons.
I spoke with many folks in the know about doing this, pros and cons, and finally decided
to go ahead with it. Over eight hours to burn it all together, then another twelve to
seal it all up! (probably because I was using an arc welder, and I'm an uncertified self
taught welder) I chose to have two locations from which to draw air, and these areas were
sleeved with a section of 1-3/4 inch ID tube. These areas, therefore, have a thicker wall
providing a greater area to seal against the NPT fittings I was to install later.
A piece of 14g diamond plate was welded in between the center spreaders. This was done for
two reasons. First, it helps to prevent the whole cage from becoming a parallelogram in a
roll, since I have no diagonal bracing. And second, it provided a dry mounting place for
my CB. And one final touch: I salvaged two sunshades from a 70s GM van, which were larger
than the Unimog issue ones, and mounted them to the cage.
The whole cage (and sunshades) then given its coats of POR-15, and bolted back into the
truck to the mounting framework I had made when I restored the body. As careful as I
was to not distort the tubing while welding it out of the truck, it did spread a little
in the center. Nothing that could not be coaxed together with ratchet straps though.
The air compressor was then plumbed to the cage using an assortment of pipe fittings,
pressure gages, air hose couplers, filters, and a regulator.
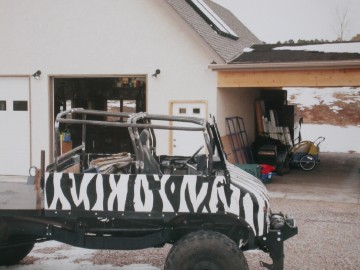
Roll.cage.6.jpg
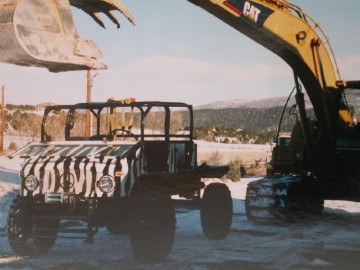
Roll.cage.install.2.jpg
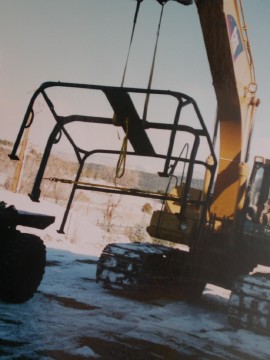
Roll.cage.install.1.jpg
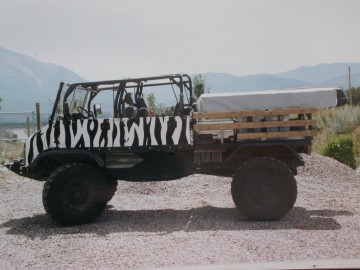
Roll.cage.final.1.jpg
Now I needed to figure out how I was going to make the window frames. The old ones were
brought out of storage for ideas. I thought that I could reuse their frames to save
some work, but after having stripped them of canvas and hardware, decided that I didn't
like them at all. These windows were of the German truck variety, having a sloping angle
to them. I found this to be limiting in terms of window area, placing canvas where I
would prefer there to be window. So, I came up with another design that had a larger
viewing area, contacted the roll cage, and used the original mounting holes already
in the doors. I fabricated them out of 3/8 inch solid round bar and they seemed to
work well. So I was now ready for the upholstery shop.
I was pretty picky about how I wanted the top to function. I wanted a rear roll up
window, side windows with double zippers, the ability to keep the top on, but fold
the windshield forward, rain gutters, and a snug fit. Well, they pulled it off, at
twice the original estimate, however! But it turned out great. My favorite trail
dressing is to have the windshield folded down, front doors and windows removed,
and the front half of the top folded back. This puts the driver and front passenger
in an open air cab, but the back seat stays covered and in the shade. Kind of like
the old limos where the driver was exposed to the elements, but the passengers rode
in covered comfort. Should the weather turn bad, a quick flip of the top, up the
windshield, a few snaps, and we are weathered in. Pretty slick.
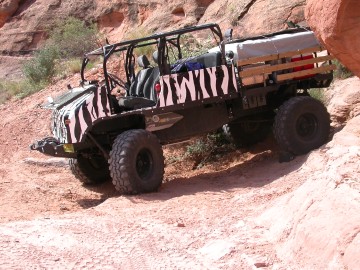
The only other things that I added were water bottle cages and a fire extinguisher.
These were easy enough to add by getting some of my old bicycle water bottle cages
and securing them to the roll cage with hose clamps. The fire extinguisher fit in
one cage with slight modification and a Velcro strap to prevent its loss from
vibration.
Now, I had a cage, seatbelts, and a top. My trail outings could venture further from
home, and be more challenging, without worry. And so they did.
pearl pass.jpg
Unimog - 27.jpg
Unimog - 24.jpg
-
|
