The ZEBRA:
Part 3 - Engine and Transmission
In order to fulfill the reliability and drivability requirements, a freshly rebuilt 3 liter 5 cylinder turbo diesel engine was installed. It was mated to the Unimog transmission via the adaptor from the German boys and uses a Unimog clutch. The adapter tilts the engine 15 degrees to help clear the body and fit in the 2.2L's location.
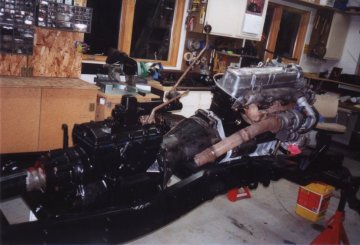
Turbo-Diesel installed at 15 degree angle. Alternator was mounted too close to the frame rail.
A great website to visit on this conversion is by
Darrin Fink. Differences between his install and mine are that I chose not to lift the cab, and my front engine mount is merely an adaptation of the stock mount. No welding to frame required.
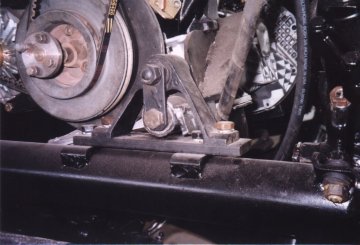
Front motor mount - an adaptation of the original unit.
(Remember, this conversion was partly done by someone else)
Keeping the body at stock height meant much work needed of the doghouse. To minimize this, I chose to replace the diesels massive oil filter to an equally massive, but remote, Amsoil duel bypass unit. Some folks have dealt with this problem by simply relocating the stock filter unit and housing using two blocks off plates with high-pressure hoses routed between them. Pros to this are simplicity, stock filtration system (which is also a duel bypass system!) and a temperature sensitive oil cooler port. Cons are finding a location suitable for the tall bulky filter housing, and retaining the stock filtration system. Amsoil does not make a kit to make this conversion. Although they will sell you the bypass filter unit, they have nothing to bolt up to the block at the stock filters location. I preferred the Amsoil unit for ease of mounting remotely, having a petcock for oil sampling, larger capacity filters with less pressure drop through them, and it looks cool. Doing this required creativity. After much thought, I came up with a design for a block-off plate which would include a port out to the oil filters, a port in from the oil cooler, and another port out to the turbo, as well as having provisions to install oil temp, oil pressure gauge and oil pressure warning lamp sending units. Oil temperature is measured as
it comes in from the cooler and oil pressure is measured on its way to the turbo. A 1-inch thick aluminum plate was precision cut using a high-pressure water jet. The plate looks factory MB issue. Any diesel converts out there wanting one need only call me. I'm sure Conrad would pump out more of these $pendy adapters for anyone wanting one.
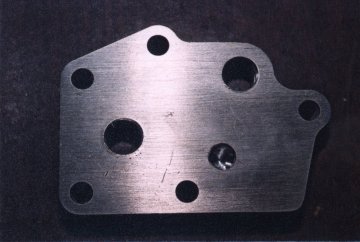
Custom water jet cut oil filter relocation plate.
Also, the engine retains the power steering pump and vacuum pump in order to power the steering and brakes. More info on the doghouse modifications in the Body section.
For cooling, the Unimog radiator was rebuilt. Although the stock 4-row, horizontal finned unit was calculated to be adequate to cool the 3.0 liter diesel, I know of two conversion having trouble maintaining cool temperatures at highway speeds. Knowing this, and planning on having a winch and lights in front of the grill, I decided to increase the cooling capacity. The old core was replaced with a 5-row high efficiency 'Z' finned core. Additionally, an oil cooler was mounted on the radiators left side with provisions in the electrical harness to add an electric oil cooler fan if needed later. The oil cooler is an MB factory unit for the 300 TD and was plumbed after the oil filters and before the turbo. Special adapters had to be fabricated to adapt the oil cooler, having metric fittings, to #8 JIC high-pressure fittings. Folks at Saunders Hydraulics in Grand Junction, CO. were able to set me up in this area nicely.
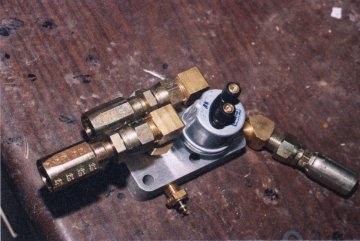
Oil filter relocation plate with all fittings and sending units attached.
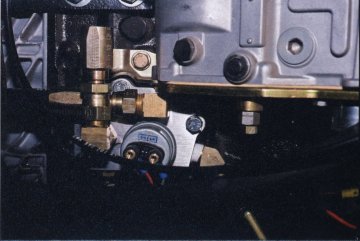
Here it is in place - It works as good as it looks, too!
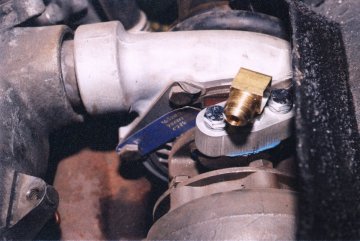
Turbo oil supply adapter.
Additionally, I wanted to relocate the stock coolant expansion tank on the dash to give more room for accessories in the cab. So a pressure cap was installed on the radiator with an overflow line into a coolant recovery tank - which is simply a modified Unimog windshield washer tank mounted on the right side of the radiator. I was extremely lucky here. When the pressure cap was installed, I paid no attention to the clearance between radiator and hood. Turns out, I have about 3mm clearance with cap installed (whew!). An
expansion tank still needs to be installed. How does it work? The engine temperature reaches no more than 210'F at all speeds and, so far, even on hot days. Oil temp however has reached 280'F on prolonged highway driving and may have kept climbing but I slowed to let it cool. Low speed trail runs on hot days have not been a problem. The local GURU on these and other German vehicles says not to worry about that temp at all and sites air-cooled VWs running oil temps in the mid to high 300's! Adding a fan to the cooler may not be a way to increase cooling since the oil gets hot when the air is flowing through it fast and is cool with little airflow. So for now I'm keeping a pretty close eye on that gauge, and I'll try changing to different oils in the future. After break-in, synthetics are going in and they have more tolerance to high temperatures anyway. Someone also mentioned to me that once the engine breaks in, there will be less resistance and therefore less heat, so it may take care of itself.
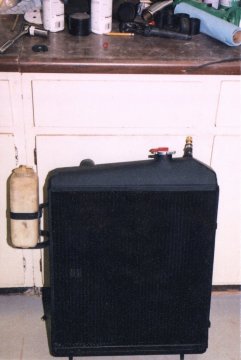
The new radiator with fancy factory ends, 5-pass z-finned high efficiency core and 15psi pressure cap. Note coolant recovery tank is modified Unimog windshield fluid tank.
Inside the cab I installed two separate heaters. One, a Red Dot (part # ???) was fitted in the driverís foot well where the original heater belongs.
This heater is a perfect fit and even has a defrost duct (optional), and puts out more BTU's than the original Unimog unit. The second heater (Red Dot # R-295 which has twin blower motors) was bulkhead mounted on the passenger side of the rear seat. Both fans are three-speed. Rather than have them both hooked up in a series fashion, they were connected parallel to each other with a multi-valved manifold mounted
in the engine compartment (where the fuse panel used to be) which allows me to selectively direct some or all of the coolant to any combination of heaters. 1/4-turn 1/2-inch plumbing valves were used, and it seems to function well.
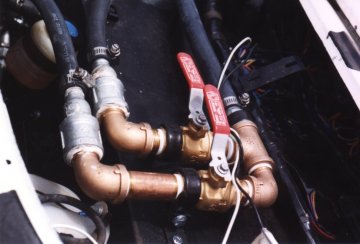
Heater manifold pieced together from hardware store parts.
If the engine starts to run hot, I can open up these "mini" radiators. Or if more defrost needed, direct all hot coolant to the one heater, etc. Wintertime will be the true test of this system. Although, this winter the Zebra will sit in the garage receiving more attention.
The Diesel installation required a 15-degree engine tilt, so the original drain plug was of little use. Another was located at the new low point of the pan. And finally, straps were fabricated between the engine block and the bell housing to distribute some of the stresses incurred by not having a rear engine mount. The installer did not feel this necessary and does not have these straps on his truck, but I figured it certainly could not hurt, and they were easy enough to fabricate while the truck was being reassembled.
Diesel fuel is delivered by an electric pump mounted near the tank on the inside of the left frame rail. I had noticed, out of hazard, that the engine did not need a fuel pump since the injector pump has its own. But later found that climbing a long hill at highway speeds or other activity which demands high fuel delivery requires the additional pump or I'd suffer fuel starvation.
Air intake was initially set up quite temporary but I've since had a chance to make it permanent. The truck came with a factory snorkel. This unit bolts onto the passenger side front fender at the air intake of the stock bulky oil bath filter. I didn't like the way the snorkel stuck out of the body since I was looking to streamline a little. I couldn't go through the hood or I'd loose the ability to fold down the windshield. So I used a variety of plumbing elbows and unions in combination with 2.2 L intake parts, turbo intake parts, modified snorkel, and hacked apart oil bath filter to come up with a routing which takes me through the passenger foot well into the cab to a K&N offset 5"x3" filter. The filter remains clean breathing interior air and can be extended up the roll cage for SCUBA crossings. As pieced together as it sounds, it actually looks like a factory setting. I haven't had it in place long enough to know how much noise it will bring into the cab, so I hope to report on this later.
Drivability for this motor is GREAT. I live at 7200 feet elevation and have good power. I have touched 65 mph, which is my redline, pretty easily, I climb hills in tall gears and have not pushed the motor yet since I'm still breaking it in. After finally accumulating enough mileage to burn one tank of fuel, I calculated a little better than 11mpg. Broken in and converted to synthetics should yield 13+. Propane injection will be something I add in the future. The interior is not yet finished so not fully insulated yet, so turbo spooling is something you can hear while climbing through the gears.
Transmission is stock Unimog 404 6 speed with added 2-speed crawler box and a PTO, which was planned to power a hydraulic pump. With the transmission out of the truck, I removed the top plate to visually inspect everything and it all looked great so no further work done here. The crawler is an awesome addition- especially when the power steering is not working! And the transmission has been shifting very well with the exception of very quick up-shifts during uphill climbs between 4th and 5th. Attempting to keep up RPM's and turbo boost by shifting this way will cause a grind into the gear. I've since stopped doing that. The crawler box came without a shifter so one had to be fabricated. It was a bit of trick to do since I have custom seating and had not seen what the factory unit looked like. I got it right on the second try :-).
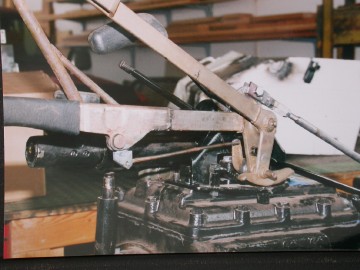
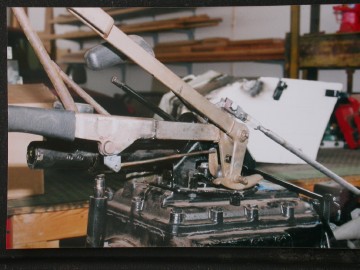
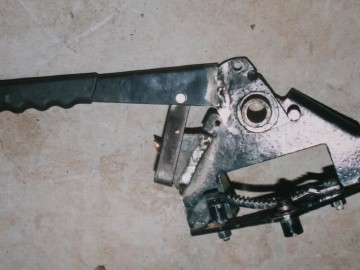
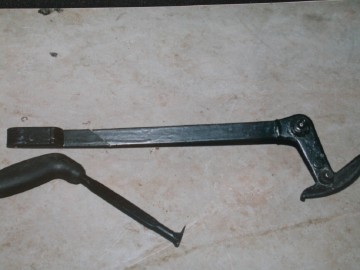
I didn't like the parking brake or the 4-wheel drive selector levers. They look like Knuckle burners. So I "modernized" the parking brake lever by grafting one out of a late model Jeep Cherokee. See the Brake Handle Update Page for details. The 4WD selector is to be changed in the near future. Also, I changed out some of my gear selector knobs to those that I had in previous cars I'd built and sold (but kept the shifter knobs as memories :-) )
Additionally, I didn't like that the front and rear lockers activated together. So I separated the rear locker from that shifter. See the Differential Lock Shifter split page for details.
I now can select:
2WD open front, open rear
2WD open front, locked rear
4WD open front, open rear
4WD open front, locked rear
4WD locked front, open rear
4WD locked front, locked rear.
This comes in quite handy, especially with the way I set the brakes up. More on the brake system later. The rear locker selector functions marginally well. It does not seem to stay engaged as well as I would like it. In the shop it performs flawlessly, on the trail, with rear axle movement, it seems to want to disengage. So this will have to be rethought and reworked.
Transmission output seals were not leaking - good thing- but the front axle output and hub input seals were - bad thing. I was able to replace these without breaking open the front hubs - very good thing. There is a tech article on this at Ron DePugh's RMM website in the tech article section. If there is something left vague there let me know so I can clear it up.
Differential and transmission breather vents were routed to inside the cab under the rear seat. This was easy enough to do with the diffs, which had pipe all ready to clamp a hose to, but the tranny vent was merely a bolt with a hole in it. What I did here was take another bolt (M10x1.50x25) and drilled a 7/16 hole through it, tapped it 1/8 inch NPT and used a brass fitting to clamp a hose to it. I T'd that into the diff line and "Boom" - remote breather.
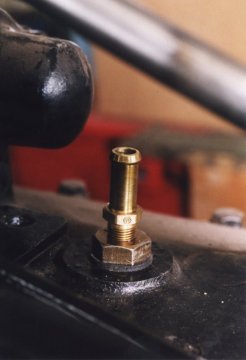
Transmission vent fitting.
Water crossings have to be 48" deep before having to worry about sucking water in there. Other stuff which fits in this section would include a hand throttle control. Sure the Unimog comes factory with one, but an accessory that I purchased came
with a very custom unit that I used instead. I've since seen them in the Northern Tool catalogue.
Engine and Transmission - Update 2006
A weakness I found, while driving home from 21 Road in Grand Junction, at 65 mph,
was that the front engine mount used 3 M-8 bolts to secure it to the engine. The
rough trail had required all suspension movement, and then some, which was too much
for the three small bolts. The engine fell onto the front frame x-member and threw
the fan blade into the radiator. That will pretty much stop you in your tracks.
I've reworked the mount to now bolt up to the engines original motor mount location
which uses 4 M-10 bolts to secure it. I think that was the last item that was
fabricated by the person who converted the truck to diesel that was left to break.
Lesson learned. The fan breaking off must have also bent the fan mounting shaft
because on a later outing, while driving to Moab (high engine RPMs) the clutch
fan bearing toasted. I was able to continue the weekend at low RPM but this also
eventually put the fan in my radiator - again!
The shaft was taken to a machinist and trued, the flange silver soldered on, and I
carry a spare, fixed flex-a-lite fan in case the bearing decides to go south again.
I can hear the fan blade rattle at higher RPMs when the bearing is loose so I have
ample warning should this happen again. I'm sticking with the stock clutched fan
because it does not make as much noise as the flex-a-lite does, and it weighs less,
so costs less horsepower to run.
The front heater part number that I had previously misplaced has been found! It is
Red Dot Number R 2020-0. The optional heater defrost duct was marginal. It did not
capture enough air flow to have any significant effect on either the windshield or
the passenger foot well. So, since there was plenty of heat making it to the driver
(I have yet to use more than the slow speed setting to get and keep warm) I redesigned
a duct that would capture more heated air and it seems to work well now.
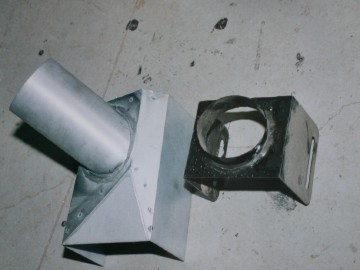
defrost.duct.jpg
I was finding that there were a lot of combustion fumes making it into the cab of the
truck as well as an oil leaking problem. Both these were are coming from the valve
cover crankcase ventilation. By extending its filter up some I was able to stop the
oil leaking, but the fumes remained. To solve this, I went back to my roots as a VW
enthusiast and have purchased a remote billet breather box. This will allow mounting
of the breather in a location where the fumes will not enter the cab.
The in-cab air filter proved to be a bad decision. The amount of noise from both the
turbo spooling and the air movement was way too much to put up with. The simple
solution was to return to the plumbing store and acquire a T with which I spliced
into the previously fabricated intake system under the hood, and cap off the snorkel
in the cab. Now, I have the option to locate the filter in the engine compartment for
normal driving and trails, or within 5 minutes time, have it in the cab for deep water
crossings or extra muddy runs. I could put up with the noise for the brief period of
assured clean air.
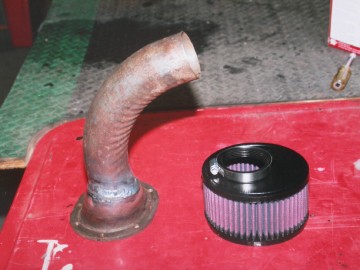
int.snorkle.jpg
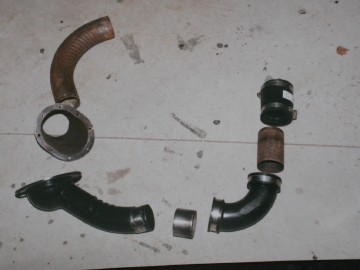
snorkle.parts.jpg
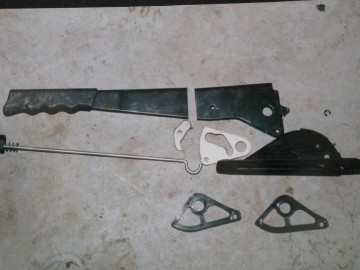
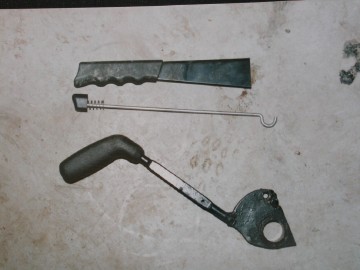
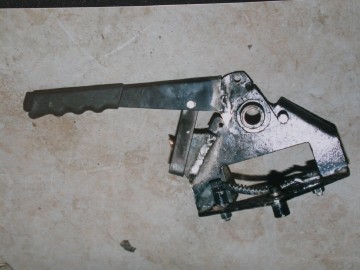
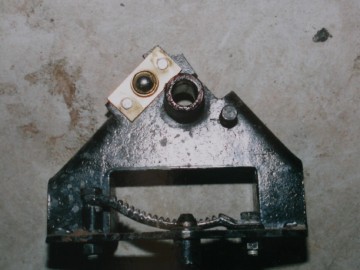
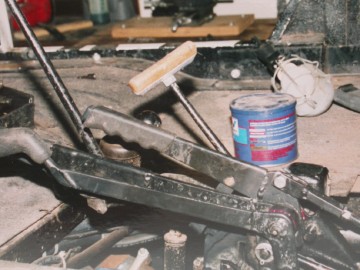
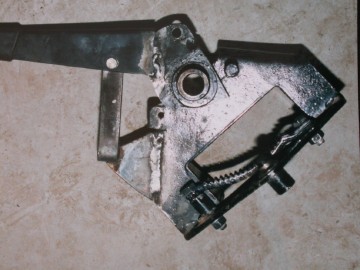
The differential locking lever I fabricated for the rear locker was functioning fine
in the garage, but on the trail with axle movement I found that it would disengage
itself. The spring ball catch did not have enough resistance to overcome the forces
subjected to it. So out it went in favor of a more positive locking mechanism using
another handbrake lever salvaged from a Jeep XJ. I've had many trail outings since
that swap and it has yet to pop out inadvertently. Having the front and rear lockers
split this way has been wonderful. On tough trails I will keep the rear locker
engaged and toggle the front as needed.
Rr.locker.XJ.handbrake.parts.jpg
Rr.locker.redo.parts.jpg
Rr.locker.open.jpg
Rr.locker.old.ball.catch.jpg
Rr.locker.handle.installed.jpg
Rr.locker.handle.engaged.jpg
Park.brake.handle.jpg
Park.brake.handle.2.jpg
DSCN3010.jpg
4WD.shifter.1.jpg
Napa part number for an excellent hand throttle cable - not quite like the one I
have, but I've installed the Napa one on my tractor and it functions just as well.
#731-1118 Balkamp
Next section: Suspension
-
|
