The ZEBRA:
The Body
Although the body has received extensive modifications, only the Unimog enthusiast would notice these changes. Even then, it would take a keen eye to find them all.
As mentioned in the introduction, the body was in dire need for reconstruction. To do this, I built a special dolly on which to move the body around in my garage. After having done that I realized that there was too much structural work needed to risk not having it solidly mounted to the frame. So back on the frame it went.
The tool of choice was now an air chisel and it was kept pretty busy for several nights as all the floor, rocker, body panels, and front clip were removed. It was a sad sight to see the bare bones skeleton of the body sitting there on the frame. I kept doubting myself in stripping the body down this far - maybe I should have just covered the brown flaky stuff up like the other guy did - NOT.
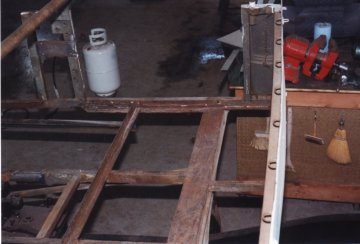
After cutting out all the rusted floor panels, here is what was left.
Do it once, do it right.....
The skeleton was in good enough condition as to not require rebuilding, although there were a couple of holes in it, but this will be addressed later. Some new bracing was installed as support for the new (used) seats to be mounted later. Everything then hit with a wire brush then coated with two coats of POR-15. New floor and rocker panels were made from 18 gauge galvanized sheet metal.
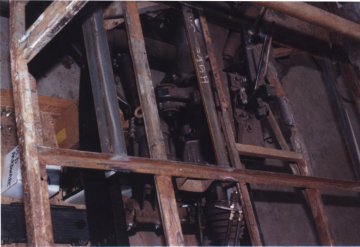
A couple of braces were added where the new seats would mount.
There was enough room beneath the cab floor and between the frame rails to install interior accessed storage compartments in three different locations. One of these, centered behind the rear seat was sized to house the two dry cell batteries. The other two, centered in the compartment under the rear seat, were limited in size but will make great spare parts storage. The factory tool storage under the front passenger seat was removed since access to it would require a tilting front seat, and it was rusted enough to need rebuilding anyway.
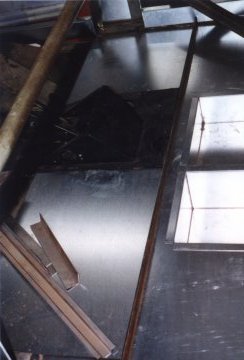
New floor panels in place - Note also the storage boxes recessed in the floor under the rear seat.
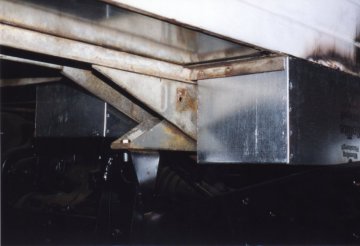
Underview of the battery box - mounted behind the rear seat.
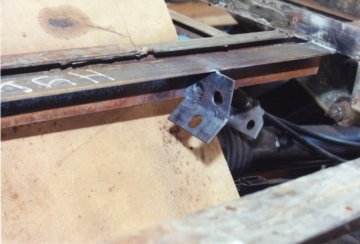
Brake flex hose mounting bracket to accomodate all of the brake modifications.
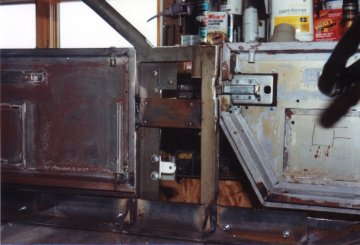
Building the roll cage mount - note the 1/4 inch plate welded to the panel behind the drivers door which will also have roll cage support. Note also the inside view of the flush mounted door handle.
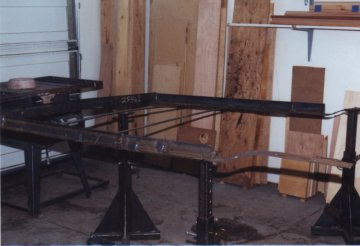
Roll cage mount ready for POR-15.
Used doors were sourced through Unimog Wherehaus in Washington state. These were then reworked to accept flush mount, lockable, door handles from Northern tool (part No. 33231) which were further modified to work with VW interior door handles. Although the interior door panels have not been made yet, once complete, it should look like a factory German issue interior package. I plan on submitting a door modification package to Ron DePugh’s Website in the near future so pics will be available.
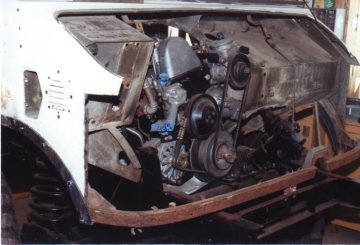
Original front clip removed at the seam and leaving some header panel for fitment of new clip.
A front clip was picked out of a group of about 50 available through Cold War Remarketing in Denver. It came with headlights, signals, hood latch, everything. It was simply cut off a probably totally usable truck with a Sawzall I'm sure. When selecting one, I made sure to get one with the seam still intact on either side, as my plan was to make it removable. Having the seam intact made that much easier. Interestingly enough, it was the only one of the lot that way. Seems the GI's doing the work were instructed to cut forward of that seam. Look for another project on Ron DePugh’s website regarding this.
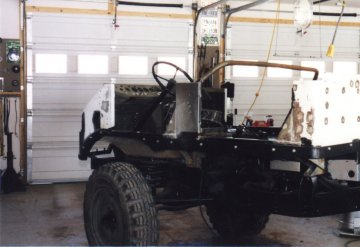
Body armor mounted and bolted to the rollcage mount. Everything POR-15d prior to installation.
The galvanized floor panels and storage boxes were installed with self-tapping sheet metal screws to make future repairs or modifications easy. Large holes were made in the floor panels at every left rear low point to allow for drainage. These were then plugged using rubber stoppers to stop drafts. Then every interior surface was coated twice with Herculiner brush/roll on truck bed liner.
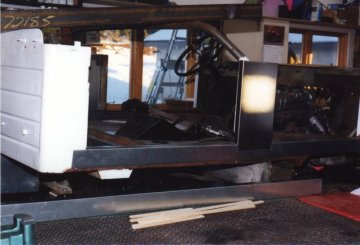
Fitting new rockers and panels into place.
After all that, the exterior of the cab was wrapped in 1/4"x3" angle steel along the wheel openings, rockers and rear panel. The interior received the same treatment and these were then bolted together sandwiching the perimeter structural framework of the cab essentially wrapping the cab in 1/2" thick steel. The purpose of this was to strengthen the cab and provide armor against trail damage as well as provide mounting points for a roll cage that would not separate itself from the body in a severe roll. It also takes care
of the few spots where there was rust in structural places. Looking at it now, you could say that it looks like it came that way. Before installing the armor, it was POR-15'd. Then, after the body was painted, it was caulked to prevent moisture from entering and also give it a nice clean finish.
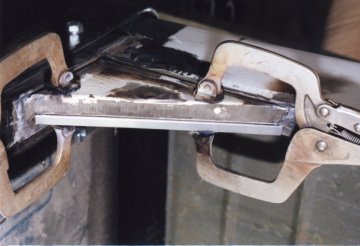
Added thickness to door filler panel for cleaner interior finish later.
After all the floor panels and armor were installed, it was time to remove the cab again to better access the underside. All the seams between the superstructure and floor panels were caulked to prevent moisture intrusion and dynamat applied to every surface available. Anything still exposed was sprayed with a rubberized undercoating spray. The body was then flipped back over and readied for paint.
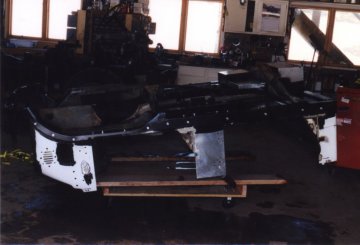
Cab removed and flipped over for underbody work.
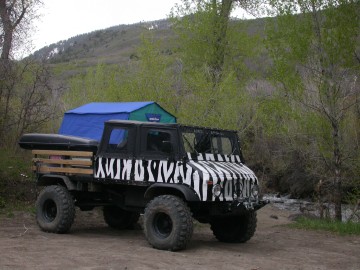
Nice paint jobs on trail rigs are a waste of money (which should have been spent elsewhere), so I spent less than fifty bucks - rollers included. I wasn't looking for a perfect finish. So minimal body and seem filling was used. POR putty was roughly fitted into some of the seams, lightly sanded and called done. Then, Porter Gliptex white exterior house paint was rolled on in two thick coats. Zebra stripping was then also rolled on with a foam roller. It actually looks pretty good. For fun, I striped in the initials of my family members into the paint job.
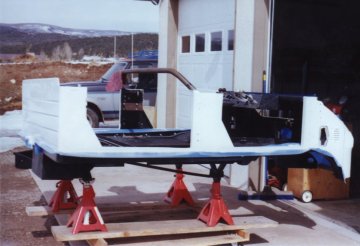
Interior of cab treated with Herculiner, exterior got two coats of house exterior paint rolled on.
Its funny, I can drive this most politically incorrect monster truck with huge tires sticking out a full 4 inches, and grandmothers will smile as I drive by only because of the Zebra print I'm sure. People always ask why I went Zebra, and I tell them a truck this size needs to be camouflaged.
I didn't like the stock rear view mirrors. They were small and vibrated a lot. Instead, I used JCW Jeep wrangler style mirrors (part no's 88-0096, and 88-0097). They have a larger mirror surface and a four-position spring mount. I also added an extra notch in the mounting plate to allow them to have 2 more positions. I then mounted them to the doors rather than the windshield frame so that they come off with the doors in extreme terrain.
These may not work on your Unimog if you have a stock rear bed or box (Mine is cab-width). Next time I trail-ride with another cargo bed truck we'll swap doors to see if the mirrors will give adequate visibility to the rear.
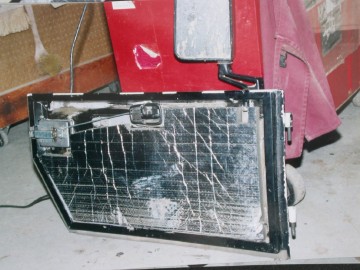
My hood suffered from sagging sides. When propped open, that side would buckle some. I remedied this by adding a couple of extra channels to support the sides. Then I insulated it with aluminum-backed insulation.
The engine cover took a while to figure out. With the oil filter relocated, the driver’s side cover could be left stock, but the passenger’s side required some work. I finally figured out that by welding the covers together wider than stock, minimal other alterations would be needed. So that's what I did. My engine cover is now a one piece unit that comes off with a little finesse and should look OK once insulated for heat, sound, and upholstered.
How does it work: GREAT!! Flush mount handles close better than stock, mirrors are very usable, cab is strong and rust-free, front clip lines-up well, removes easily and provides excellent access for engine repairs. Hood closes OK, not great, but OK. Body armor has yet to be tested, but the roll cage is being fabbed and is coming together as planned. Paint has held up well to tree limbs, and touches up very easily (yes, I've already lost a couple of stripes). Storage boxes in the floor have come in quite handy and do not interfere with frame flex.
Overall, I'm very happy with how the body turned out.
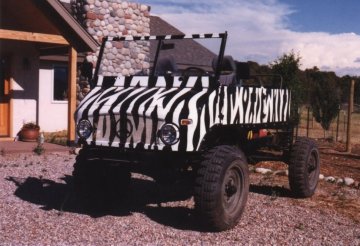
Here is a teaser - at this point the truck was running for neighborhood test-rides (and birthday parties) but not street legal. Notice the body armor, flush mounted door handles, TJ mirrors and 4Runner front seats.
The Body - Update 2006
My doors are now finished, complete with interior upholstered door panels, elastic
pockets to hold stuff, and VW latch pulls. I figured that the softer material would
help to cut down on interior noise and road noise, and it has been nice to have the
extra storage for small items. The VW latch pulls work and look great, as if meant
to be there. Look for the Door Modification package on Ron's website for complete
description and photos on how this was done.
Having a removable front clip has also been nice. It has come of once already, and
will come off again for the brake and steering modifications. The access it gives
me is a real time saver.
Paint touch ups have also been easy. Some stripes were lost to trail obstructions
and these were easily replaced with another roller and can of paint.
I've decided to replace my hood since the original one was falling apart and needed
bracing. I found a good used one for $75 bucks and couldn't pass it up. It was even
white! I'll be needing another roller to stripe it, but again, thats certainly no
problem.
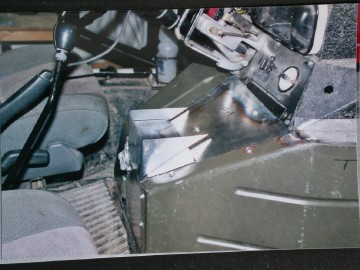
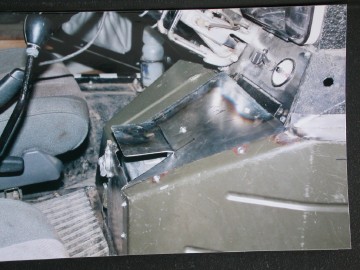
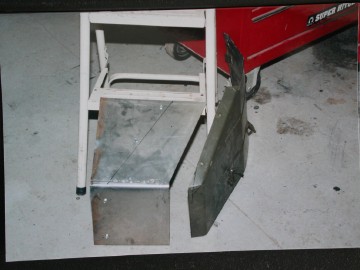
The engine cover I had put together initially did alright, but was not sealing as
well as I would have wanted. So I redid those, and kept them as two pieces, as
original, and only had to modify the passenger side. It turned out much better
this time and even gave me a small tray, required for valve cover clearance,
that I keep small items in.
Rt.cover.mod.4.jpg
Rt.cover.mod.3.jpg

Rt.cover.mod.1.jpg
Rt.cover.mod.2.jpg
The rear seat was redone using the original metal frame, sheeted with new wood,
refoamed and recovered with black auto upholstery vinyl. 4 seat belts were added,
the two outer ones being three point, and both inner two point, and integrated
into the roll cage, as are the front three point belts as well. One item of note,
I chose self retracting, inertia belts salvaged from a recycling center and they
work great, but, when off camber it can be a struggle to move about in the drivers
seat with the belt locked in. I now trail ride technical stuff with the shoulder
strap behind my back to give more freedom of movement. And I can't always rebuckle
after having been out of the cab for trail inspection if I left the truck off camber,
or on the obstacle somehow. Small things, yes. But something to ponder if you
are going to install seat belts in your Unimog.
The Door Panels - Update 2006
My doors have received quite a lot of attention over the course of the restoration
process. The original doors were in poor shape and so I bought some used ones that
were like new from Unimog Warehaus back when Dirk used to sell 404 parts. The first
thing I did was remove the old door handles in favor of some flush mount, lockable
ones I ordered from Northern Tool and Equipment.
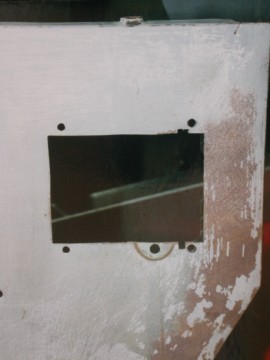
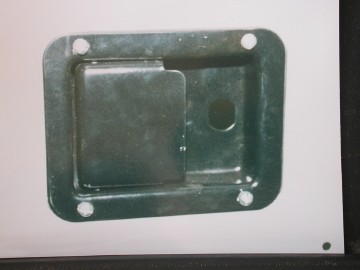
To Install these, I had to cut out a hole large enough to mount the handle, and in
the proper location for the old door latch on the pillar. (photos - Ext.door.latch.hole,
Flush.door.latch.installed) This led to the problem of now not having a way to open
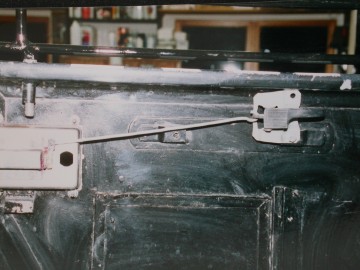
the door from the inside. I figured that VW, being another German manufacturer,
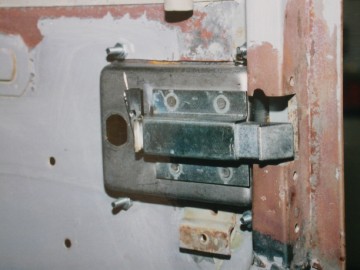
could provide me the solution. So I salvaged 4 interior door latch pulls from various
VW's along with their trim and pull rod. Then, the exterior handle was modified to
accept a pull rod and everything installed. (photos - Door.latch.detail, Interior.door.latch.detail)
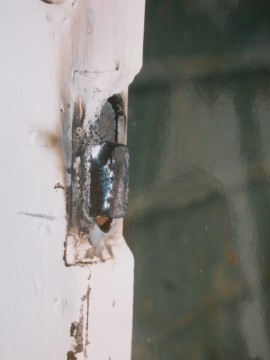
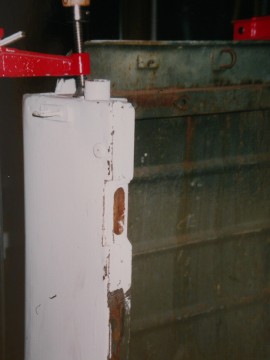
To make the latch catch on the door pillar I simply welded a flat bar scrap into
the original catch location. The piece was tapered to function more smoothly with
the tapered door handle and viola - flush mount handles that allow the doors to
close with ease. Remember to leave some slack when aligning the door with its
catch to allow for weather stripping later. photos - Stock.door.catch, New.door.catch
Ext.door.latch.hole.jpg
Door.latch.detail.jpg
Flush.door.latch.installed.jpg
New.door.catch.jpg
Stock.door.catch.jpg
Interior.door.latch.detail.jpg
Now mirrors. The original ones were small and vibrated a bunch. I wanted something
that could fold back, had more viewable area, and could be removed for tight or
extreme trails. So I bought some Jeep YJ half door mirrors from JCWhitney and
installed them on the doors. If you plan on doing this, remember that my rear bed
is cab width, so the mirrors, being closer to the body, work well. If you are
still with wide rear bed or box, some measurements will have to be done to see
if these mirrors will allow you to see back. Id be willing to swap doors with
a stock truck to test this, but have yet to wheel with another Mog that has
a rear bed still on.
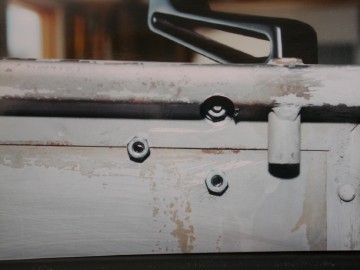
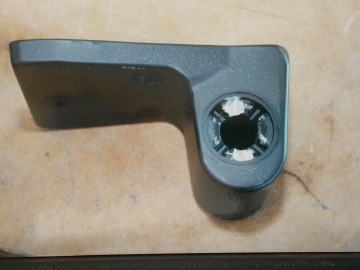
Anyway, back to the install. In order to have these work, I needed to modify them
a little. First, to place them where mounting would would be easier, I swapped the
left and right bases. This also placed the mirror farther forward in a more desirable
location. (photo - YJ.mirror.detail) Next, the base comes with detents to provide two
different mirror angles. - 45 forward, and 45 backward. This was not enough for me
since I also wanted them to be able to flush with the body. So I used a Dremel tool
to make new detents. (Photo- YJ.mirror.modification) I now have a multitude of mirror
locations, including one where the mirror arm extends into the cab, over the door
(although I have yet to use that).
YJ.mirror.detail.jpg
YJ.mirror.modification.jpg
And finally, in order to add some extra creature comforts, conveniences and hopefully
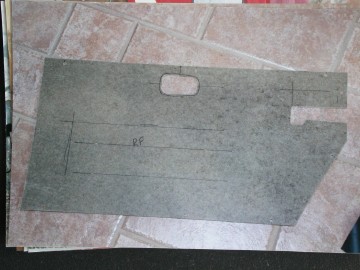
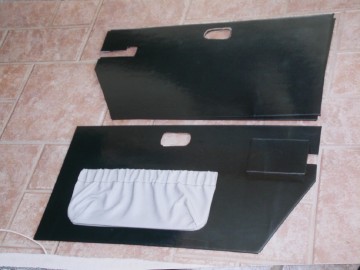
decrease interior noise levels somewhat, I elected to fabricate interior door panels.
This was done using fiber board as the panel, then upholstered with vinyl. (photos
- Door.panel.fibre.board, Door.panel.storage.pocket) The original steel storage compartments
that came on the doors had to be removed using a grinder in order for the panel to
be flush. JCWhitney elasticized storage pockets were installed in their place on
the panels using T-nuts so that there would be no visible hardware holding those in place.
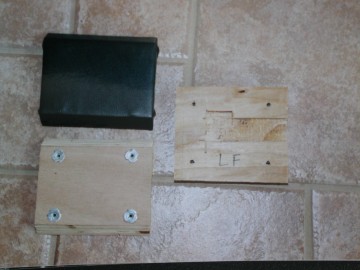
One problem I did have was that the exterior handle protruded into the door too
much to be covered by the door panel alone. This was solved by making a cover
piece out of plywood and chiseling out anything that interfered with its mechanism.
It was then upholstered and installed also using T-nuts. (photo-Door.latch.cover)
Door.latch.cover.jpg
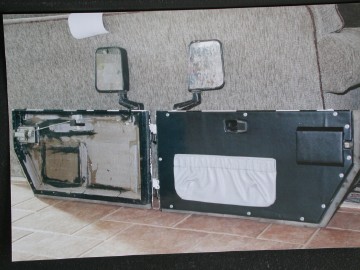
photo - Finished.Door.panel - shows a paneled door panel alongside of a bare one.
The hardware was later changed to black screws and trim washers making them much
less visible.
Door.panel.fibre.board.jpg
Finished.Door.panel.jpg
Door.panel.storage.pocket.jpg
Door.insulation.jpg
I thought that I might need a pull of sorts to grab hold of the door, but decided
that topless, I could just grab the door itself, and with top on, I could grab a
hold of the window frame. So I never did put on pulls, and have not missed them at all.
In the end, I am very pleased with how it all turned out. The handles work very well
allowing closure of the door without having to turn the handle, as I have had to do
on other 404s. I can lock up, giving me the false sense of security that no one can
enter my soft-top truck. And the panels give a nice finished look. I'm not sure they
decrease noise levels though, but for the storage pockets alone, I would repeat the
procedure. And finally, the mirrors work and look very well.
Unimog - 10.jpg
Next: Electrical
-
|
